Workflow Management
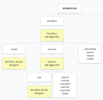
Menu map
You manage workflows in the Workflow Management page accessed from Workflow > Workflow in the portal menu.
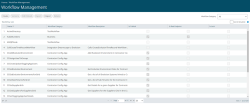
The Workflow Management page displays list of existing workflows:
By default, 20 entries are shown on a list page. You can change this number, or select pages at the bottom of the list. You can also filter by workflow category using the drop-down list at the top left of the workflow list.
The Is Publish and Is Service columns show if the workflow is published and if it is published as a web service.
The menu items, Create, Versions, Edit Details, Export, Import, and Delete are explained below.
Create
To create a new workflow:
- Click Create on the Workflow Management menu.
- The Workflow Studio application launches. See also About Workflows.
- Login to Workflow Studio with your portal credentials.
- Implement the workflow in Workflow Studio and then click File > Save or File > Save & Publish.
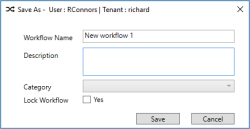
- In the pop-up, type the Name, Description and Category and then click Save.
Versions
To view the various versions of a workflow parent, select it in the Workflow Management list, and click Versions on the menu. Alternatively, double-click the workflow in the list.
The Workflow Version Detail page lists the versions, one of which may be selected for editing, publishing, and so on. See also Workflow Versions Management.
Edit Details
These details are the definitions for the workflow parent; Name, Description, and Category. They are set initially when you create and then save a new workflow in Workflow Studio.
To change the initial details later:
- Select the workflow in the Workflow Management list and click Edit Details.
- Make the changes and then click Save.
Export
- To export a workflow to your downloads folder:
- Select the workflow in the Workflow Management list and click Export.
- In the Export Workflow pop-up, select the version of the workflow to be exported from the drop-down list and click Export.

- A zip file is written to the Downloads folder which may be imported into a tenant portal in the same or other infrastructure.
Import
To import a workflow:
- Click Import in the Workflow Management page.
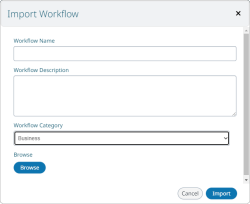
- In the Import Workflow pop-up, enter a name and description for the workflow, and select the category from the drop-down list.

- Browse to, and select the previously exported zip file.
- Click Import.
- Check that the import was successful.
Delete
The Delete button is greyed out if a version of the workflow is published; you need to unpublish the version first.
Before deleting a workflow, make sure there are no dependencies on it; for example, web applications, other workflows, and workflow triggers.
Select the workflow in the Workflow List and click Delete.


